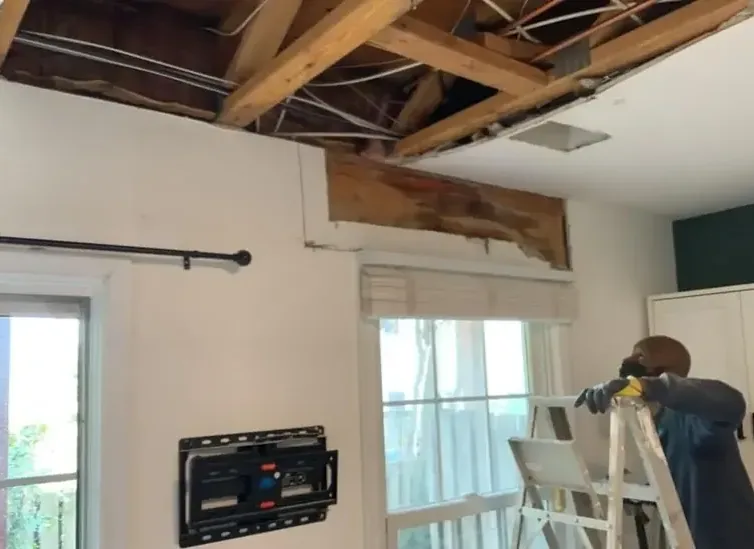
A ceiling mark discovered after summer rain needs a route investigation from above as well as attention inside the room. July and August are the rainiest months in Wendell, where summers are typically hot and humid. The inspection should connect the observed rainfall, roof entry, attic materials, and interior finish changes, with safe access established before anyone approaches a wet or sagging surface.
Key takeaways
- Photograph the first ceiling change from a safe position.
- Record whether dripping starts during rain or continues afterward.
- Leave roof and wet attic access to the appropriate professional.
- Track insulation and framing along the observed water route.
- Coordinate roof correction with interior drying before finish replacement.
Record the stain as a location and a sequence
A close photograph captures the shape and color of a ceiling mark, but a wide view shows where it sits within the room. Including the nearest wall, light fixture, or window helps the inspector locate it later.
The owner can add whether the mark appeared suddenly, enlarged during rain, or began dripping after the weather changed.
The timing record should describe what was observed without requiring a diagnosis. Water noticed during rainfall, a drip that continues afterward, and a mark that remains unchanged each give the inspector useful information.
Keeping these observations with photographs creates a clearer starting point than a general statement that the roof has been troublesome.
The roof leak damage inspection should follow the route above the finish. Water may travel along framing or another surface before appearing in the occupied room.
Connecting that path to the roof assessment helps the owner understand why the inspection area can extend beyond the ceiling mark.
- Take a room view before adding close photographs.
- Note which weather conditions accompanied visible dripping.
- Identify lights or electrical fixtures beside the affected surface.
Keep the room clear of unstable overhead material
A wet ceiling can present an access problem before the source is reached. Sagging, separation, or falling finish material calls for keeping occupants outside the affected zone.
The owner should describe those conditions to the responding professional instead of moving beneath the area to investigate its depth or collect another photograph.
Contents directly below the wet patch also need a safe handling plan. Furniture can be assessed for relocation once access is established, and photographs should preserve its original position and visible exposure.
That record helps distinguish a damp upper surface from water that reached the contents or the flooring beneath it.
Electrical components require particular caution when water appears nearby. Occupants should avoid wet switches, fixtures, and connected equipment and report their location.
The appropriate professional can establish the conditions for safe work before attic inspection, ceiling access, or interior equipment placement begins.
Follow the water trail across attic surfaces
The roof opening and the ceiling mark may occupy different positions. Framing, roof decking, insulation, and other building surfaces can redirect water before it becomes visible below.
A useful inspection describes those intermediate contact points rather than drawing a straight path from the stain to the roof covering.
Wendell Boulevard Historic District provides one setting for interior finish preservation. Where the affected building contains existing trim or decorative ceiling details, photographs should record them before access changes the surface.
The inspector can then connect any necessary opening to the wet assembly while preserving a clear account of the surrounding retained finish.
Attic access also depends on the actual construction and current conditions. The owner should leave traversal and material disturbance to the professional assessing the space.
The resulting record can show which areas were reached, what was wet, and whether another opening is needed to inspect a concealed continuation of the route.
- Map contact with framing and insulation separately.
- Photograph finish details before selective access.
- Record the purpose and location of each inspection opening.
Connect the roof repair with the interior response
The roofing professional should describe the entry condition found and the correction proposed or completed. That information belongs beside the interior route photographs.
It helps the restoration team interpret continued dripping and distinguish a new entry from moisture remaining in materials already contacted during the event.
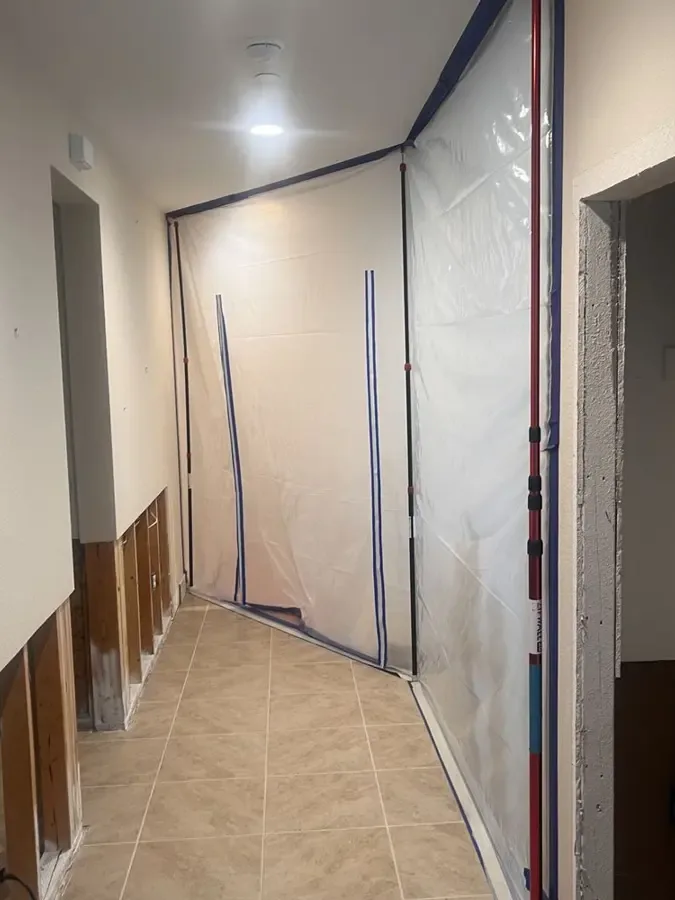
If accessible water has reached flooring or contents, the indoor extraction work needs its own access plan. The route for equipment should avoid the unstable ceiling zone and leave room for source inspection.
Contents placement should also preserve the areas that will need further assessment after liquid is removed.
Commercial development has expanded along Wendell Boulevard and Wendell Falls Parkway. In a shop with an overhead leak, staff movement and display protection add practical constraints to the same roof and interior coordination.
The work plan should identify those routes before equipment and removed materials begin occupying the usable floor area.
Assess wet insulation and adjoining cavities deliberately
Insulation can conceal the upper face of a ceiling and obscure the continuation of a wet route. The assessment should identify the material present, the exposure it received, and whether it can remain.
Where removal is necessary for access or condition, the record should explain the specific layer and area affected.
Adjacent wall cavities may also need inspection when water reaches a ceiling edge. A damp cornice or wall corner can connect the overhead route with lower finishes.
Checking those interfaces prevents the interior scope from ending at the most conspicuous stain while another assembly remains wet behind an intact surface.
Photographs of the exposed cavity should retain enough context to show orientation. A close image of wet material becomes more useful when paired with a view of the opening and surrounding framing.
These records support insulation replacement and finish repair after the retained components have been assessed for drying.
- Include the upper ceiling face when it becomes accessible.
- Check wall intersections along the water trail.
- Describe removed insulation by location and condition.
Dry retained materials through the observed route
The structural drying plan should identify retained framing, ceiling edges, and adjoining wall materials. Each location needs an accessible monitoring point appropriate to the assembly.
The equipment arrangement can then address the areas actually affected instead of relying on a machine placed somewhere beneath the visible mark.
Hot, humid summer conditions form part of the local setting, while the technician measures conditions inside the affected building. Keeping the work area arranged as planned helps maintain a consistent drying environment.
Occupants should report stopped equipment, moved hoses, or changes to doors that were part of the agreed setup.
Rain during the drying period deserves a fresh observation of the original route. Renewed dripping or an enlarging mark should be reported to the roof and restoration professionals.
Their records can then connect the source condition with the material readings and identify whether further entry correction or access is needed.
Repair the finish after the hidden work is documented
Painting the stain addresses appearance, while a complete repair also accounts for what happened above the surface. The finish contractor needs the source correction description, retained material assessment, and boundaries of any removed ceiling or wall section.
This gives the repair a clear connection to the inspected water path.
If trim was removed, its profiles and original junctions should be available in the photograph set. The contractor can use those details when planning the connection to retained finishes.
Keeping components labeled during storage also helps avoid a later search for pieces that were moved during initial access or contents protection.
The owner should keep a final record showing the cavity before closure and the room after repair. Those views complement the initial stain photographs and roofing report.
Together they explain how an overhead symptom was traced, which materials were handled, and what work restored the affected interior for ordinary use.
Questions
Why can the roof defect be away from the ceiling stain?
Water can follow framing or other surfaces before reaching an opening into the room. The inspection traces those contact points to connect the interior symptom with the entry location.
Should an owner enter a wet attic to move insulation?
Attic access and disturbance of wet material should be handled by the appropriate professional. The inspection must account for the construction, footing, electrical components, and current condition of the space.
What should be reported if rain returns during drying?
Record renewed dripping, growth of the original mark, or water appearing in another location. Sharing that observation with both trades helps connect the roof condition with the indoor material response.
Can a ceiling be repainted as soon as dripping stops?
Finish repair should follow assessment of the affected layers and documentation of the source correction. The contractor needs the retained material condition and any unfinished cavity work before concealing the surface.