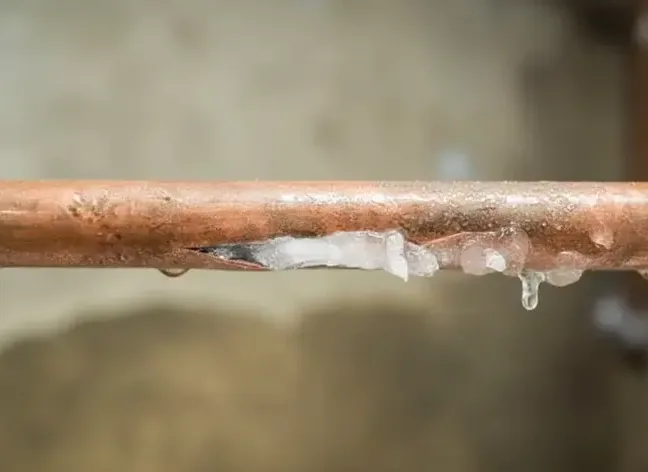
A pipe leak may become visible when water begins flowing through a damaged section during a thaw. Dunn is in Harnett County, and its listed January mean daily minimum is 31.8 degrees Fahrenheit for the 1991 to 2020 climate normals. For an affected home, the urgent observations are where water is escaping, which rooms lie below it, and whether the shutoff can be reached safely.
Key takeaways
- Keep occupants away from sagging ceilings and wet electrical equipment.
- Identify the safe shutoff route before attempting source isolation.
- Report the sequence from reduced flow to visible escaping water.
- Include rooms below the damaged pipe in the inspection.
- Retain pipe repair findings and cavity drying records together.
Notice the change from restricted flow to a release
The sequence of events can help the plumber understand a newly discovered leak. An owner may have noticed reduced fixture flow before hearing water in a wall or finding a spreading patch.
Recording those observations in order is useful even when the damaged section remains hidden behind a finished surface.
January 21, 1985: Dunn recorded a low temperature of minus four degrees Fahrenheit. That historical cold reading provides local winter context.
During a current incident, the plumber assesses the actual pipe, its location, and the observed release to determine the repair and the surrounding materials that need attention.
The frozen pipe damage assessment should include the first visible escape point and the rooms connected to it. A wet ceiling below a bathroom, for example, requires a route investigation above as well as an inspection of the room below.
Describing both levels gives the initial visit a clearer starting point.
- Record when reduced flow was first noticed.
- Note the location of new water sounds or dripping.
- Identify rooms directly below the visible release.
Choose safe access before approaching a valve
A shutoff is useful only when it can be approached without entering a hazardous area. Standing water near electrical equipment, an unstable ceiling, or an obstructed route changes that decision.
Occupants should keep clear and tell the responding professional where the valve is believed to be and what blocks access to it.
The owner should also describe whether the release appears to be continuing. Water actively spreading at a wall base calls for source control as well as indoor removal.
A mark that stopped growing after isolation still needs assessment, but that change is useful information for the professionals planning access and equipment.
Attempts to warm concealed plumbing or open a finished cavity should be left to the appropriate trade. A damaged connection can remain hidden, and the surrounding assembly may contain electrical components or unstable material.
The homeowner's useful contribution is a clear report of visible conditions and safe access, not exploratory opening of the wall.
Trace overhead water beyond the ceiling stain
A stain marks a place where water became visible, while the path above it may include framing, insulation, and another room. The inspection follows that route to locate the source and the materials contacted along the way.
A ceiling corner and a wall base may be connected by the same release even when the intervening surface looks normal.
The lower room should remain clear of a sagging or separating finish. Furniture can be protected or moved only when safe access has been established.
Photographs from a dry doorway may preserve the early condition without requiring anyone to stand beneath the affected ceiling or touch its surface.
The room file should identify the opening used for inspection and what it revealed. Exposed insulation, wet framing, and damaged ceiling material have different handling decisions.
Recording those layers gives the owner an explanation for removal and helps the repair contractor understand the cavity before it is enclosed again.
- Keep traffic away from visible ceiling deformation.
- Document the upper and lower room names together.
- Record the materials found behind each access opening.
Arrange plumbing access beside indoor water removal
The plumber needs space to reach the defect, while the restoration team needs access to the water and affected finishes. A coordinated layout keeps tools, hoses, and removed materials out of each other's routes.
It also helps prevent contents from being moved into a place that will soon become part of the repair area.
The water extraction work should cover the liquid that reached lower floors and adjoining rooms. Water can collect beneath a rug or along a cabinet edge after escaping from a wall.
Clearing the central puddle leaves those edges to be assessed and may reveal a wider route than was visible at discovery.
Clinton Avenue and Cumberland Street cross central Dunn. For the interior work, room labels are more useful than general location descriptions: upper bathroom, hall ceiling, and lower closet each identify a separate part of the route.
Consistent labels allow plumbing photographs and mitigation photographs to be matched later.
Examine the repaired pipe and nearby wet assembly
A pipe repair record should identify the actual damaged component and the correction performed. The owner can retain photographs of the defect while it remains visible and any description supplied by the plumber.
This material explains the source work without relying on an assumption about the age or type of plumbing elsewhere in the home.
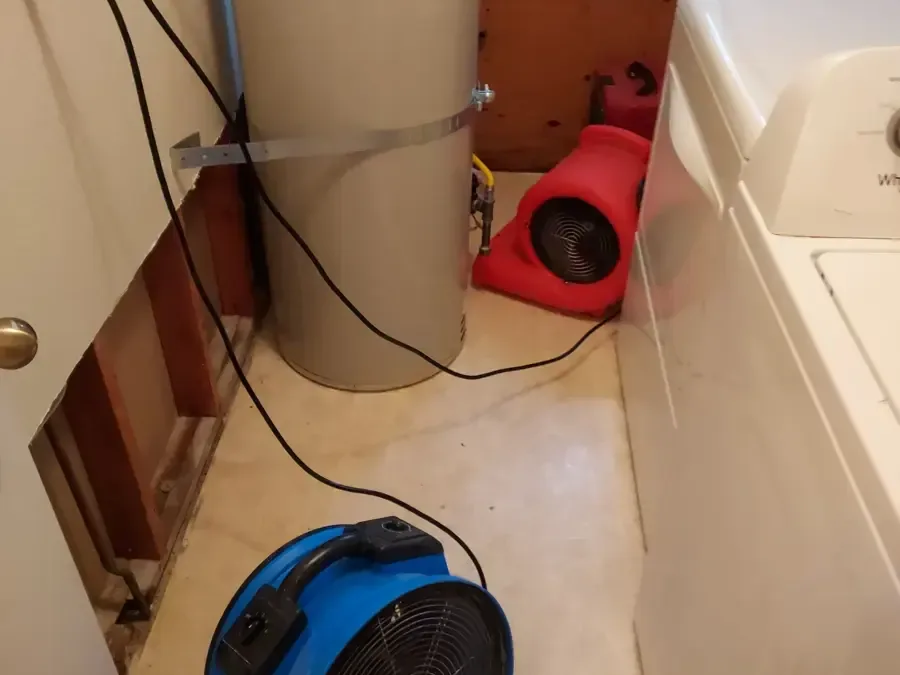
Nearby finishes need their own condition assessment. A successful connection repair does not remove moisture already absorbed by insulation, wallboard, or wood.
The team should identify what was retained for drying, what was removed, and whether any concealed section still lacks adequate inspection access.
The source location may also reveal a condition that needs a separate preventive repair conversation. An exposed cavity or an access arrangement can be described to the responsible trade while it is still open.
Keeping that discussion in the repair file helps avoid losing a useful observation once the wall or ceiling has been restored.
Dry the cavity as deliberately as the occupied room
An open room and a confined cavity present different access conditions. Equipment arranged for the floor may not address a concealed layer above the ceiling.
The drying plan should name the assembly being treated and explain how it will be reached and monitored while the rest of the home remains organized.
The structural drying checks should revisit marked locations at the wet framing, wall edges, and affected flooring. Recording the material at each point helps distinguish the response of one layer from another.
Equipment adjustments then have a clear relationship to the areas that remain wet.
Occupants should report renewed dripping or a change in the size of a visible patch. Those observations may call for another source check or a closer look at trapped water.
A stable room arrangement and accessible monitoring points help the technician compare the condition from visit to visit without repeatedly moving household contents.
- Keep cavity inspection points available until reassessment.
- Report renewed water after the plumbing repair.
- Record changes to equipment operation during the drying period.
Close the room with the source and interior records together
Before the cavity is closed, the repair team should have the pipe correction details and the retained material assessment. The scope can identify insulation replacement, ceiling work, wall finishing, and any remaining access requirement.
Listing those components separately helps the owner understand why the work continues after the visible leak stops.
The final room photographs should show the area before new finishes conceal the inspected layers. These views are useful for future maintenance and for explaining the work to another contractor.
They also preserve the relationship between the pipe location and the lower room where the damage was first noticed.
A household winter plan can include an accessible valve description and the contact information for the appropriate plumbing professional. Those practical notes should reflect the actual property layout learned during the incident.
Keeping them with the repair file makes the next response easier to organize if another water concern occurs during cold weather.
Questions
Why can a leak appear after fixture flow improves?
A damaged section may release water as flow resumes. The plumber needs the observed sequence and the current escape location to investigate the component involved.
Should a ceiling be opened to let trapped water out?
An affected ceiling should be assessed by the responding professional. Occupants should remain away from sagging or unstable material rather than attempting to puncture or remove it.
What if the valve is behind standing water?
Safe access takes priority. The owner should describe the valve location and the wet or electrical obstruction so the appropriate professional can arrange isolation.
What needs checking before the ceiling is repaired?
The source correction, retained cavity materials, and remaining moisture conditions should be documented. The finish contractor also needs the access boundaries and any insulation replacement scope.