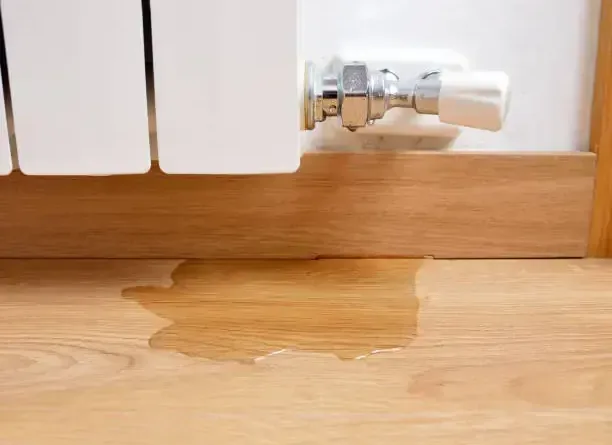
A wet wood floor can change shape while its upper surface still looks familiar. Clayton Historic District includes residential neighborhoods north and south of the railroad as well as part of the downtown commercial district. In an affected interior, the flooring assessment begins with the boards actually present, their supporting layers, and the water route, with existing trim and finish details recorded before access work.
Key takeaways
- Photograph board edges and finish details before furniture or trim moves.
- Identify the floor covering and supporting layers at the affected property.
- Avoid sanding a distorted surface before the moisture assessment is complete.
- Keep repair access tied to the area that became wet.
- Save final material readings for the flooring professional.
Preserve the floor's original details in photographs
A room photograph shows the pattern of the floor and its relationship to doorways, hearths, and built in furniture. Close views can then capture board width, edge details, existing gaps, and visible finish wear.
This combination is useful when later repairs must connect an opened section with the surrounding retained floor.
Main Street is the historic core of Clayton, and the district contains almost three hundred historic homes and buildings. Inside any one of those buildings, the assessor needs the actual floor construction and condition.
A room may contain an earlier covering, a later repair, or several joined materials that need separate descriptions.
The wood floor water assessment should record where water was noticed and which floor changes followed it. Photographs can distinguish the wet route from an older scratch or worn finish.
Keeping those observations together supports a more precise discussion of what can remain and what needs further evaluation.
- Include thresholds and existing patch boundaries in photographs.
- Describe earlier defects supplied by the owner.
- Identify loose trim before access work begins.
Understand the layers beneath the visible boards
An installed floor is an assembly, and its upper covering is only the part seen from the room. The technician should identify the supporting surface, accessible underside, and any intermediate layer before selecting a drying approach.
A trapped layer can change how the affected area is reached even when the boards above remain largely intact.
Edges at an existing transition or an accessible opening can provide useful information with limited disturbance. The chosen access point should answer a specific question about material construction or wetting.
Its location and the findings beneath it belong in the record so that the next trade understands why it was opened.
Water movement may follow a joint into the next space rather than stop at the room boundary. A hall transition, cabinet base, or adjoining closet can therefore need attention even when the central room holds the clearest damage.
The inspection map should connect those locations instead of giving each doorway an arbitrary stopping point.
Respond to distortion without forcing the finish flat
Raised board edges or a changing seam deserve assessment before cosmetic correction. Pressing pieces back into position, loading the floor with furniture, or sanding an uneven surface can interfere with evaluating the condition.
The owner can preserve the observation with a photograph and keep unnecessary traffic away from a visibly unstable area.
The direction and extent of the change help the flooring professional describe the affected section. A localized change beside a radiator or appliance needs a different source conversation from a broad wet route crossing the room.
Recording the shape change alongside the moisture map links the visible symptom with the materials being examined.
An assessment should also distinguish the board from its finish and attachment. A surface coating may change while the underlying wood remains recoverable, or a connection may fail where the surface looks acceptable.
Component level descriptions make the repair decision clearer than labeling the whole room simply damaged or undamaged.
- Leave altered board edges available for inspection.
- Avoid moving heavy displays onto a distorted patch.
- Record changes at the same seams during follow up visits.
Remove accessible water without losing the inspection route
If liquid remains at joints or beneath movable contents, its collection should be coordinated with the material assessment. Furniture feet and rug edges can hide the original water boundary.
Photographs made during careful relocation help the technician connect those concealed areas with the rest of the room.
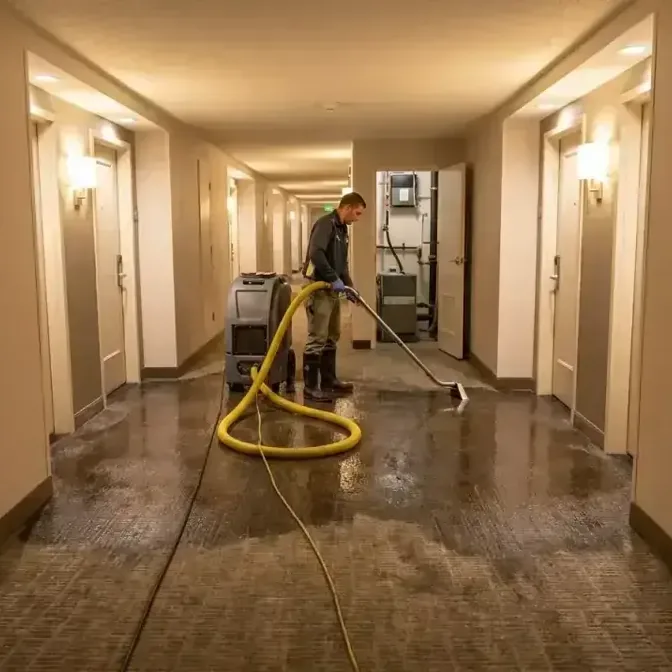
The water extraction plan should suit the flooring condition and access that is actually available. Removing visible liquid reduces the immediate load, while the inspection establishes which layers still hold moisture.
These tasks work together when the operator records areas that could not be fully reached beneath fixed cabinets or partitions.
Source correction also belongs in the floor file. A repaired supply connection, an unresolved overhead drip, or continuing entry at a doorway changes what happens to the room next.
The responsible trade should describe the correction performed so that persistent wetting is not mistaken for a floor that is simply drying slowly.
Monitor the wood and the supporting materials separately
Drying records need to identify the material measured and the location of the measurement. A reading at a board face and a reading at a supporting layer describe different parts of the assembly.
Keeping those observations distinct gives the flooring professional a clearer picture of how the whole section is responding.
The structural drying arrangement can then be adjusted to the retained assembly. Access, air movement, and dehumidification should serve the areas that remain wet, with equipment positions explained to the occupants.
A cabinet or rug returned too early may obstruct the location that still needs inspection.
Clayton Historic District spans residential areas on both sides of the railroad. Whether the affected floor is in a house or a commercial interior, the monitoring record should use specific room names and marked points.
That detail allows later reviewers to follow the condition of a particular threshold or board group through the work.
- Label the material associated with each reading.
- Keep the same measurement points accessible.
- Note equipment interruptions beside the affected room entry.
Keep selective repair decisions open until assessment
The repair conversation should separate moisture condition from the visible result. A dried board may still have an appearance or attachment problem requiring attention.
A finish that initially looks poor may need evaluation after the assembly stabilizes. The flooring professional should assess those conditions with the drying record available.
If a section must be removed, photographs and sample information can help describe the adjoining retained work. Existing trim profiles, threshold heights, and board direction matter when planning the connection.
The objective is a clearly documented repair boundary that reflects the actual affected assembly rather than a broad assumption about every floor in the building.
Historic interiors may also contain earlier alterations worth recording before they disappear behind repairs. A visible patch or changed subfloor can affect how the new work meets the old.
The contractor can note these features in the repair scope so that the owner understands the proposed connection and the parts intended to remain.
Hand the installer a room specific completion record
The flooring installer needs more than a statement that equipment has been removed. The handoff should identify retained layers, final measurement locations, access openings, and known finish defects.
It should also describe any portion of the assembly that was inaccessible or is awaiting further repair assessment.
The owner can keep this material with photographs taken before the loss or before mitigation. Together they provide a useful account of board layout, finish condition, and the work completed beneath the visible surface.
This record remains valuable even when a repair is scheduled after the drying equipment has left the property.
Before furniture returns, the installer and owner should agree which surfaces are ready for use and which remain part of the work area. A deliberate return preserves access for final flooring decisions.
It also prevents a carefully documented repair boundary from being hidden by rugs or heavy items before the responsible trade has finished its assessment.
Questions
Should a cupped floor be sanded immediately?
Sanding should wait for a flooring assessment that considers the retained assembly and its moisture condition. Removing the raised surface too early can change the boards before their response is understood.
Why photograph trim if the floor is the wet material?
Trim and thresholds define the edges of the repair. Their profiles, joints, and attachment details help the contractor reconnect an opened area with surrounding retained finishes.
Does a historic district location identify the floor species?
The installed flooring needs to be identified at the building. Its material, construction, and condition are the details used to select a drying and repair approach.
What should remain accessible after extraction?
The marked floor edges, adjoining transitions, and any inspection openings need continued access. Furniture placement can be arranged around those locations until the flooring assessment is complete.